Silk jersey hem
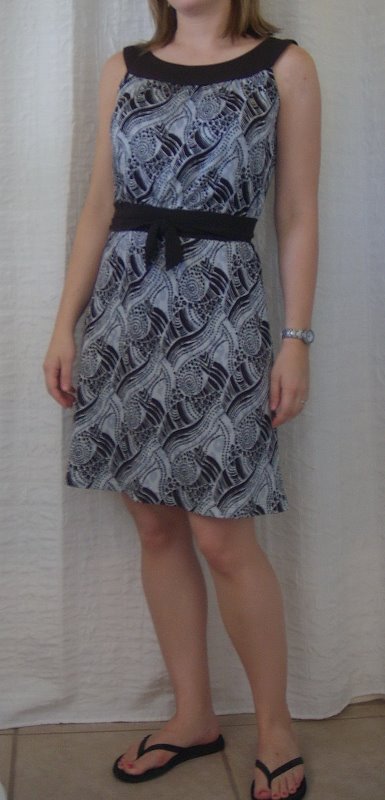
I hemmed this dress today right before DH and I went out for sushi, so naturally I wore it fresh off the ironing board. It is over 100 degrees here today so a sleeveless silk jersey frock was just the ticket.

 This is my 'preferred' method of hemming silk jersey, I like the coverstitch look but lacking a serger I've had to come up with my own method. DVF often uses a blind hem, which also looks nice, but I find hard to replicate on a home machine. With contrasty prints it can be hard to hide the stiches with only 1 color of thread. Either way, I find fusing a band of tricot interfacing to the hem makes it look and hang so much neater. For this method you need a 1" hem allowance, to do a narrower finish adjust the interfacing strip and allowance accordingly.
Once I pin up the hem to where I want it, I press it so I get a nice crease to mark the hemline. Then I open it up, wrong side up, and fuse a 2" strip of tricot interfacing (cut on the crosswise grain to preserve stretch around the hem) to the inside of the dress, centering the strip so 1" falls to each side of the hemline crease. Then I trim off the excess length below the interfacing, and press the hem back into position, folding the interfacing back on itself. I use a twin stretch needle from the right side of the dress, and stitch along the top edge of the hem allowance, catching the edge in the underside zig zag formed by the needle. Between the interfacing and the zig zag, the edges are very well finished and will stand up to the washing machine.

You will need to test the twin needle on some scraps first, I find I need to loosen up my bobbin tension quite a bit, and often tighten the top tension. If the zig zag is too tight it has a tendency to pull the two stitching lines together and create a dome shape to the fabric in between. The interfacing helps to stabilize this as well as give the hem some weight and a nice place for the stitches to 'sink in'.
By the time I started on the hem, I noticed my bobbin was almost out and I didn't have a lot of thread left on the spool. I used a different color bobbin, and filled a partial bobbin with the rest of the brown I had to do the twin needle stitching. I was sweating it as got close to the end, this is all I had left when I finished!
Kwik Sew 3575

I tried tying the belt in front this time, I think the back looks cleaner that way.
 This is my 'preferred' method of hemming silk jersey, I like the coverstitch look but lacking a serger I've had to come up with my own method. DVF often uses a blind hem, which also looks nice, but I find hard to replicate on a home machine. With contrasty prints it can be hard to hide the stiches with only 1 color of thread. Either way, I find fusing a band of tricot interfacing to the hem makes it look and hang so much neater. For this method you need a 1" hem allowance, to do a narrower finish adjust the interfacing strip and allowance accordingly.
Once I pin up the hem to where I want it, I press it so I get a nice crease to mark the hemline. Then I open it up, wrong side up, and fuse a 2" strip of tricot interfacing (cut on the crosswise grain to preserve stretch around the hem) to the inside of the dress, centering the strip so 1" falls to each side of the hemline crease. Then I trim off the excess length below the interfacing, and press the hem back into position, folding the interfacing back on itself. I use a twin stretch needle from the right side of the dress, and stitch along the top edge of the hem allowance, catching the edge in the underside zig zag formed by the needle. Between the interfacing and the zig zag, the edges are very well finished and will stand up to the washing machine.

You will need to test the twin needle on some scraps first, I find I need to loosen up my bobbin tension quite a bit, and often tighten the top tension. If the zig zag is too tight it has a tendency to pull the two stitching lines together and create a dome shape to the fabric in between. The interfacing helps to stabilize this as well as give the hem some weight and a nice place for the stitches to 'sink in'.
By the time I started on the hem, I noticed my bobbin was almost out and I didn't have a lot of thread left on the spool. I used a different color bobbin, and filled a partial bobbin with the rest of the brown I had to do the twin needle stitching. I was sweating it as got close to the end, this is all I had left when I finished!


Comments
Post a Comment